Sales tax and VAT
If your organization charges Sales Tax or VAT, enable this feature.
Enable Sales Tax/VAT
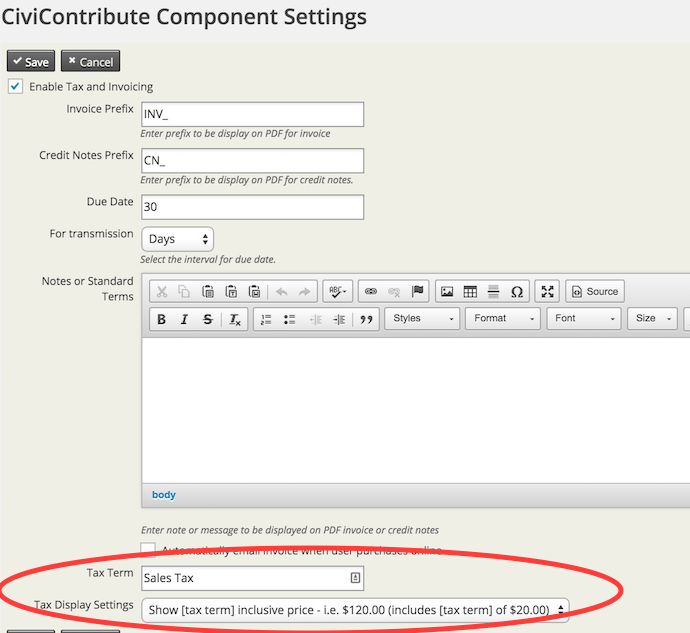
Go to Administer > CiviContribute > CiviContribute Component Settings and check the Enable Tax and Invoicing box.
On this screen, you can also set:
- Tax Term — the text your organization wants to use for the relevant Sales Tax or VAT.
- Tax Display Settings — how your organization wants to display the Tax/VAT:
- No breakdown, total only
- Shows as inclusive price - $120 (includes $20 tax)
- Shows as exclusive price - $100 + $20 tax
Add a Financial Account for Sales Tax/VAT
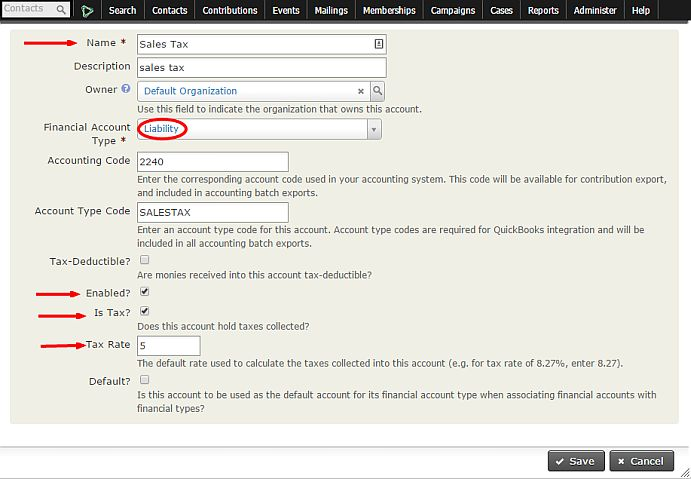
Once Sales Tax/VAT is enabled, create one or more Financial Accounts for Tax/VAT at Administer > CiviContribute > Financial Account. Scroll to the bottom of the page and click Add Financial Account.
To create the Sales Tax Account, set Financial Account Type to Liability. Select Enabled and Is Tax, and specify the Tax Rate. If you use Quick Books, the Account Type Code should be set to SALESTAX. Accounting Code should be based on the organization's specific Accounting Codes.
Assign the account to a Financial Type
After creating the Financial Account, go to Adminster > CiviContribute > Financial Types. Find the Financial Type this Sales Tax applies to and click Accounts, then Assign Account.
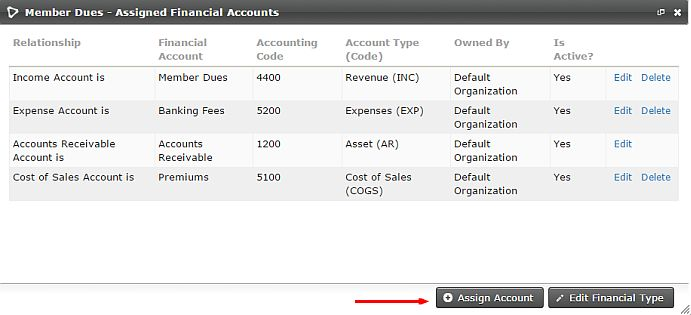
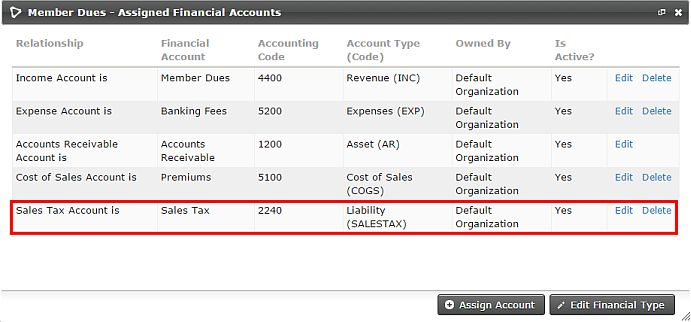
For Financial Account Relationship, choose Sales Tax Account is. In the Financial Account field, select your Sales Tax account. Click Save.
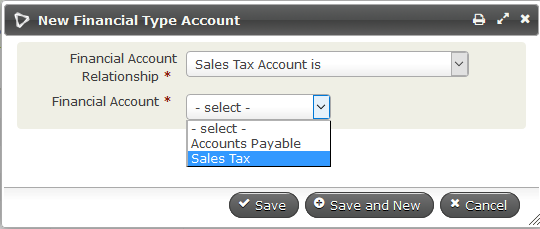
The Sales Tax Financial Account will appear with the other Financial Accounts for that Financial Type.
For more advanced configuration with accounting software packages like QuickBooks, involve your organization's bookkeeper or accountant in setting up your Financial Types and Financial Accounts.