Import contributions using Civi Import
This procedure assumes you have installed the Civi Import extension, which is shipped with CiviCRM.
Installing extensions
If you need more information about installing extensions, check the Extensions section.
Prepare a data file containing the donations you want to import. The file could come from a third party or be created internally. Then go to Contributions>Import Contributions to start building the import.
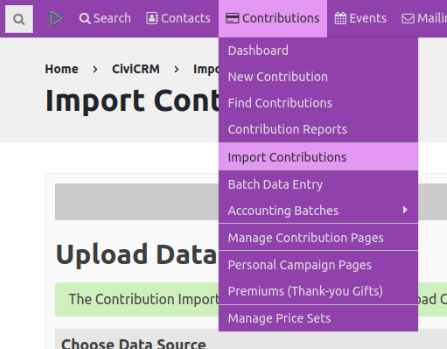
Choose a data source and import options
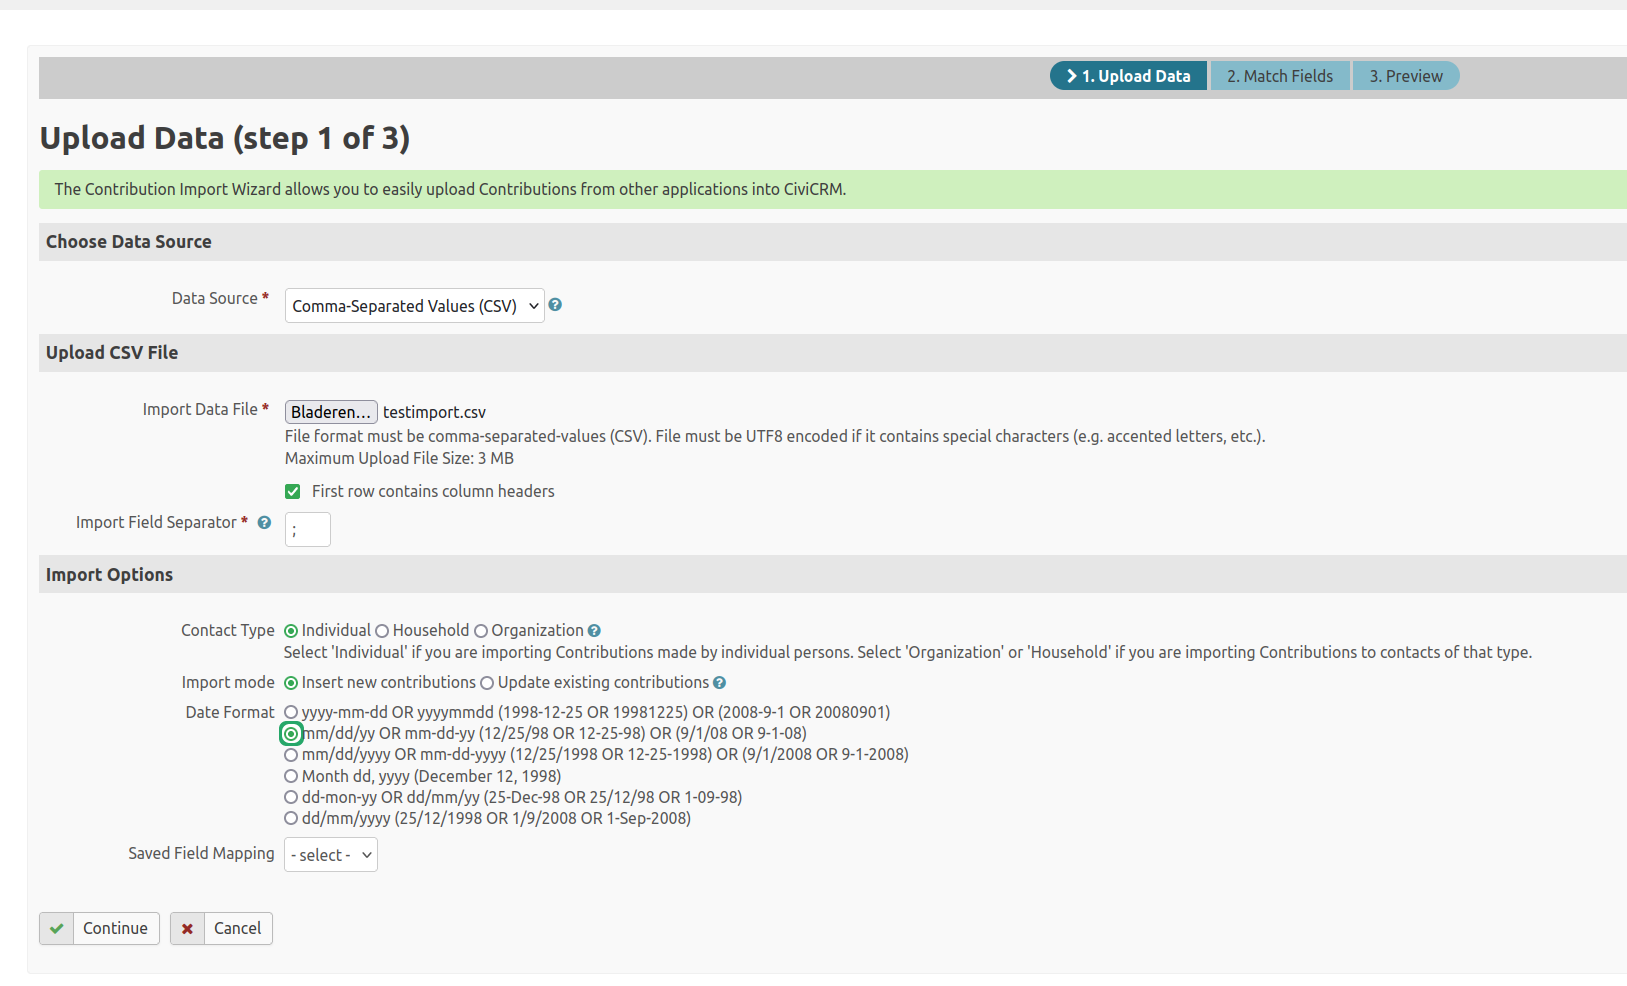
Choose a data source
This example uses Comma-Separated Values (CSV). You can also import from a spreadsheet (.odt or .xlsx files) or a SQL Query.
Select your file
Use the button next to Import Data File to select a file from your local computer or network.
UTF8
Your CSV file, if you are using that format, needs to be UTF8 encoded if it has special characters. See the Wikipedia definition for background.
Specify the field separator used in your file.
Be careful with decimal values
Be careful when importing decimal values in combination with your field separator. In some countries, the comma (,) is used as a decimal separator. Using a comma as the field separator as well will mutilate your amounts. To be on the safe side, you might want to use ; as a field separator.
Set import options
Select or specify:
- which contact type you are importing contributions for;
- whether you are creating new contributions or updating existing contributions;
- the date format used in your import file;
- a previous mapping, if you want to use one, from the saved field mapping select box.
In this example, select contact type Individuals because the contributions were made by individual people. Select insert new contributions because you are importing new data, and select the mm/dd/yy date format. Leave the saved field mapping blank because there is no saved template of mapped fields.
Match fields
Click Continue to open the Match fields page. Here you match fields in your file to fields in CiviCRM.
The options under Import to set the rules and structure of the import:
- Because you selected new contributions, the Contribution box is automatically set to Create and cannot be changed.
- The Contribution Contact box controls what happens to contacts imported with the contributions. This example updates or creates contacts; you could instead match existing contacts or update existing contacts.
- You selected _contact type as Individual on the first screen, but you can change it here.
- You must specify the dedupe rule used when importing.
- You could also import soft credits, but this example does not.
More background on dedupe and soft credits
For more background on dedupe rules, see Deduplication. For more background on soft credits, see Soft credits.
In the data mapping section, match the fields in your file to the CiviCRM fields where their data should be imported. Column Names shows the fields in your file; Matching CiviCRM Field shows the corresponding field in CiviCRM. Select do not import for any data in the file that you do not want to import.
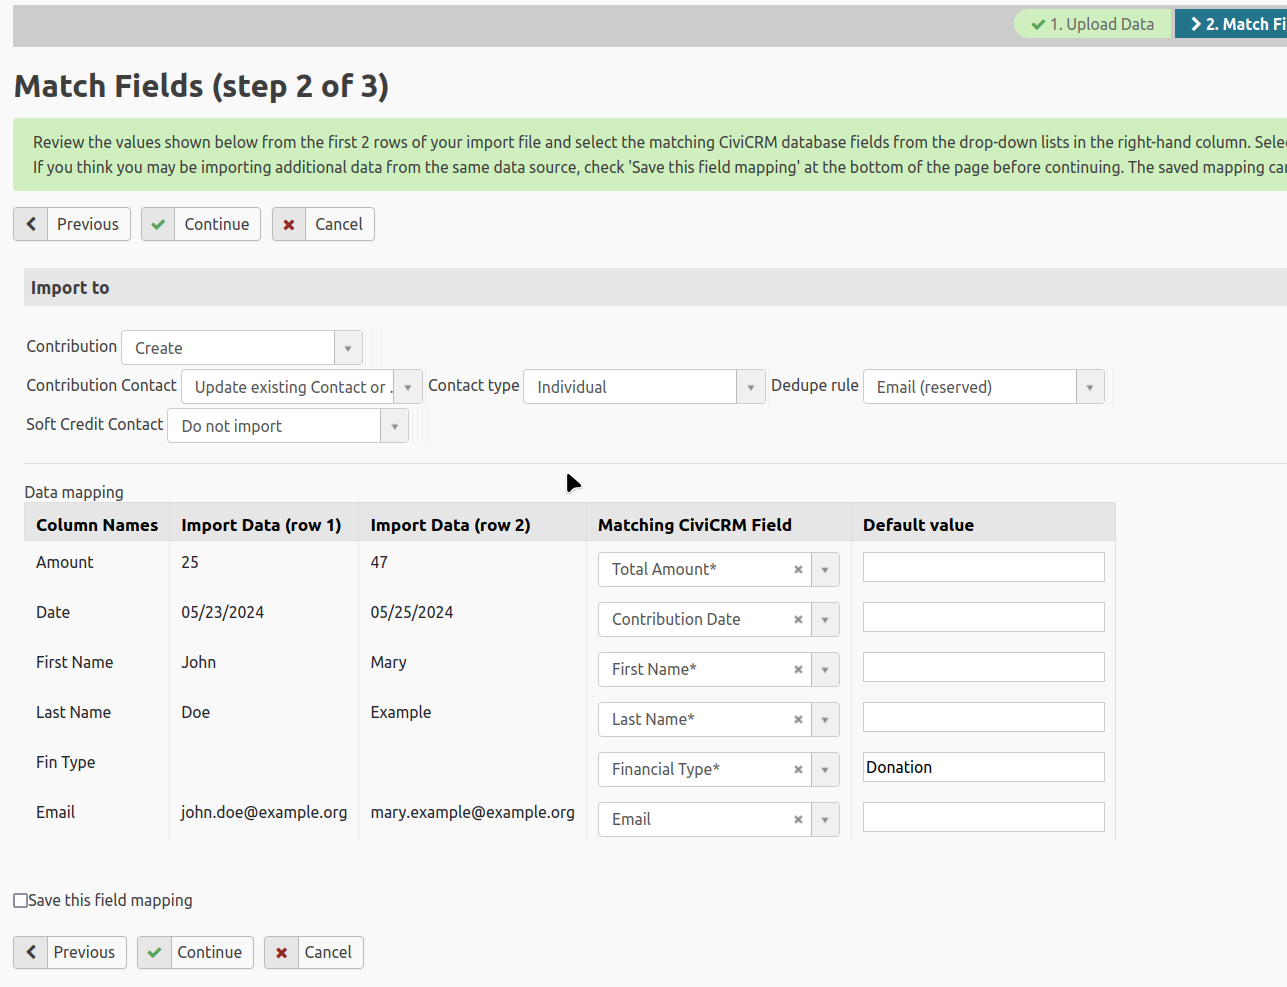
You can specify a Default value for a CiviCRM field. It is used whenever the field has no data in your input file. In this example, Financial Type has no data in the file, so it uses a default value. The field must exist in the import file, but it can be empty.
When you are happy with the mapping, click Continue. If you want to use the mapping again—for example, to import more files with the same data layout—tick Save this field mapping.
Preview and import
Preview what will happen. If you are happy, click Import now.
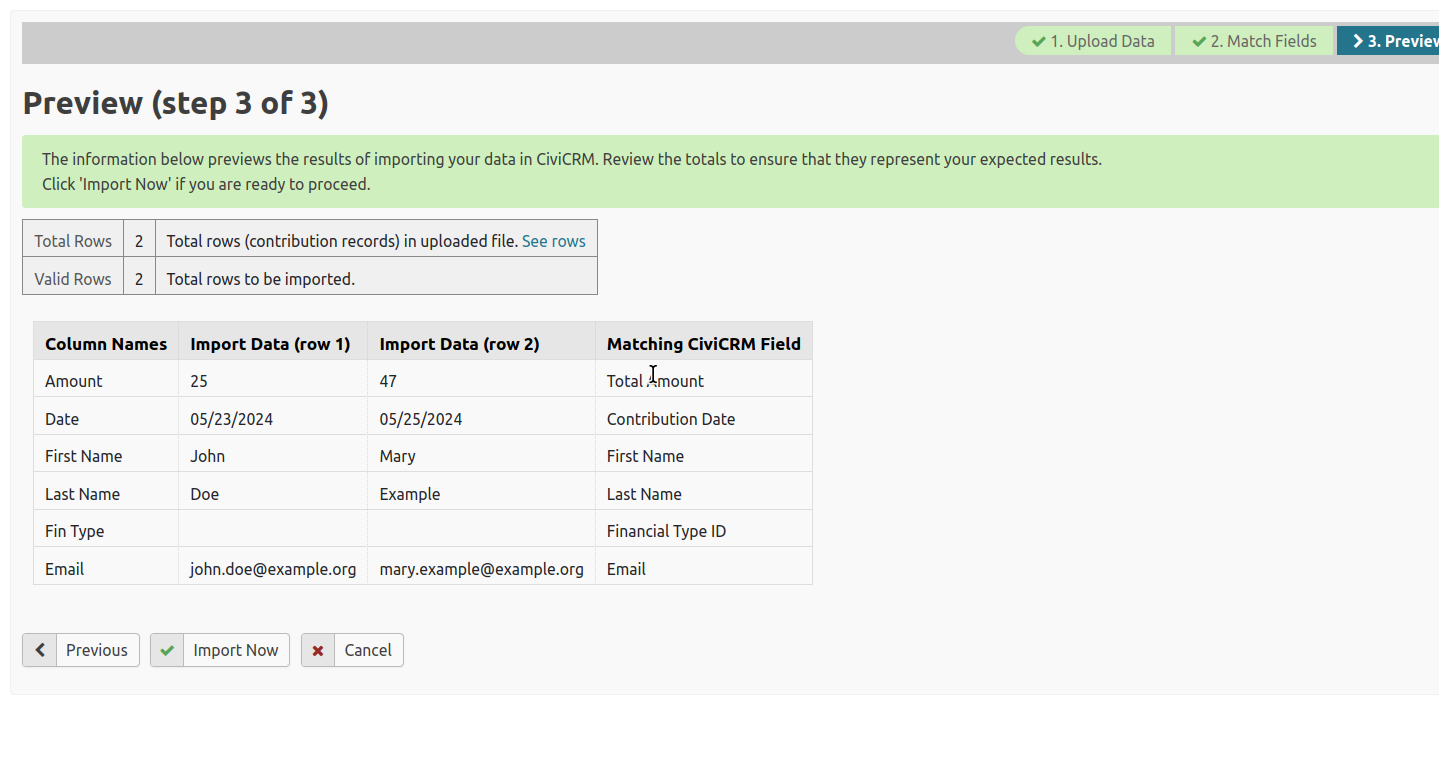
The results show how many rows were imported if the import succeeded, or how many rows had errors if it did not. Click See rows to view detailed results or errors.

You can also click a hyperlinked contribution ID number to view a specific contribution and review its imported data.